
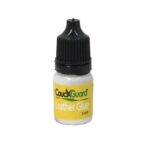
Leather Glue

$11.95
CouchGuard Leather Glue is a strong, flexible adhesive that dries clear. Comes with Backing Fabric 100mm x 100mm for repairing cuts and tears including pet damage. Our glue for leather repairs, is a professional grade and suitable for all leather types.
Also part of the Complete Leather Repair Kits
- Description
- Additional information
- Reviews (2)
- Directions
Description
CouchGuard® Leather Glue adhesive for strong , flexible bond when used with backing fabric.
Additional information
| Weight | 0.100 kg |
|---|---|
| Size | 5mL, 20mL, 40mL |
2 reviews for Leather Glue
Only logged in customers who have purchased this product may leave a review.
How To Repair Leather:
Simply read these easy to follow directions and your lounge will be like new again in no time at all!
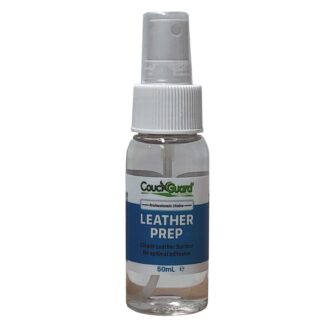
REMEMBER: Dirty leather needs to be completely cleaned with CouchGuard® Deep Leather Cleaner before using the Leather Prep.
For Minor Scratches
1 Place a drop sheet or old towel around the couch to be repaired to protect floor coverings. (not supplied in the 50, 125 or 500ml kits)
2 Make sure leather is free from contaminants like body oils etc by using our Deep Leather Cleaner. (Sold Separately)
3 Spray the CouchGuard® Leather Prep onto the leather to be repaired and wipe dry.
The leather prep is not a leather cleaner and the leather must be recoloured after using.
4 Lightly sand the repair area with 400 grit sand paper and 600g on the leather around around the repair.
5 Wipe away loose particles thoroughly.
6 Using the spatula provided, slowly build the flexible leather filler over the scratch.
Allow to air dry.
7 If required, lightly sand with 600 grit sand paper followed by 800 grit sand paper.
8 Wipe area over with the damp microfibre towel before applying CouchGuard® Leather Colour.
9 Clean up with water.
Poor preparation will lead to a poor finish even peeling. Take you time and be patient.
Tip: You may use a hairdryer to help dye quicker
Note: The Flexible filler is AIR DRY so keep the lid on tight when not using. Use sooner than later. It will harding.
For Cuts Deep Scratches or Holes
1 Place a drop sheet or old towel around the couch to be repaired to protect floor coverings.
(not supplied in the 50,125 or 500ml kits)
2 Make sure leather is free from contaminants like body oils etc by using our Deep Leather Cleaner. (Sold Separately)
3 Spray the CouchGuard® Leather Prep onto the leather to be repaired and wipe dry. The leather prep is not a leather cleaner and the leather must be recoloured after using.
4 Lightly sand the repair area with 400 grit sand paper and 600g on the leather around around the repair.
5 Wipe away loose particles thoroughly.
6 Cut the backing fabric larger then the cut or hole and place on the underside of the leather using the tweezers. Once in position, apply a small beed of CouchGuard® Leather Glue to one side of the cut and press down firmly. Now repeat on the other side. You can use a hairdryer to heat the area, activating the glue and press down firmly. Clean up any excess glue with water.
7 Using the spatula provided, slowly build the flexible leather filler over the scratch in coats. Allow each coat to air dry. See Note: below.
8 If required, lightly sand with 600 grit sand paper followed by 800 grit paper.
9 Wipe area over with the damp microfibre towel before applying CouchGuard Leather Colour.
10 Clean up with water between coats (Spatula).
Try using a small piece of leather and cut to the size of the hole then glue into place. There is a small piece on the lid of the Complete Leather Repair Kits.
Repairing Cracked Leather
Being worn, open leather, it will absorb the leather prep more so than "normal leather" so make sure the area is completely dry before applying the resin.
1 Wash the area well with Leather Prep using a microfibre towel. Dry well
2 Lightly sand 400g sandpaper to remove any flaking or loose topcoat.
3 Using a sponge, apply the Leather Repair Resin in an even, thin layer to start with and allow to dry. Repeat until the area is repaired to your liking. You may also pour the resin on for larger areas and allow it to flow out remembering though, the thicker you apply it the longer it will take to dry.
4 You may use a hairdryer to help dye quicker.
5 Lightly sand with 400g to 600g paper and apply CouchGuard® Leather Colour to finish off the repair. You may also apply a thin layer of leather filler if needed at this point.
Warning: Always test on a small hidden area before use
Recolouring Leather
1. Place a drop sheet or old towel around the couch to be repaired to protect floor coverings. (supplied in the 1, 2 and 3lt kits)
2. Make sure leather is free from contaminants like body oils etc by using our Deep Leather Cleaner. (Sold Separately)
3. Lightly sand the leather all over with 600g sand paper to etch the surface.
4. Spray the CouchGuard® Leather Prep onto the leather to be recoloured and wipe dry. The leather prep is not a leather cleaner and the leather must be recoloured after using.
5. Shake the CouchGuard® Leather Colour well and poor an amount into the roller tray. Cover the foam roller with the leather colour, rolling out and excess colour and start to apply it to the leather surface.
6. Apply the colour in layers and don't apply too much at once. Work your way around the leather covering all the large areas 1st.
7. Once the main large areas are recoloured, generally 4-5 coats you then need to start on the fiddly hidden bits. This is best done the next day using the foam sponge and or foam brush supplied. Use the spreaders (wall dowels) between the leather to hold it apart.
8. Hold the leather up and apply one coat of colour. Dry using a hairdryer and repeat until covered. Once dried with the hairdryer, place a piece of white cotton cloth between the 2 surfaces for a good 24 hours. This will stop the surface sticking together.
9. Sometimes you may find small amounts of dust or specs of dirt in the finish. Simply lightly sand the surface with 800g sand paper, reduce the leather colour with CouchGuard® Leather Reducer (10%) and apply 2 more coats. You are now done!
10. Clean up with water.
Tip: The Flexible filler is AIR DRY so keep the lid on tight when not using.
You may also spray our leather colour on too if you have a compressor and spray gun. The colour will need to be reduced with CouchGuard® Leather Colour Reducer by no more than 10%.
Warning: Always test on a small hidden area before use
Tips
Tip 1 Rinse the sponge well in under running water and ring out the excess water before using.
Tip 2 Do the tape test after 1 or 2 coats to check adhesion. Once dry, apply masking tape and rub down firmly then rip off. If no colour is stuck to the tape, continue recolouring. If there is colour stuck to the tape, prep again.
Tip 3 After 4 coats of colour, let completely dry the lightly sand with 800g sandpaper. This will remove and debris. Reduce the colour down a little then apply two more coats.
Tip 4 Use the plastic dowel plugs to hold the leather apart while colouring. i.e: between seating cushions, between the seat cushion and the arm cushion etc. Once the leather is coloured and dry, move the dowel along and touch up the area.
Tip 5 Place a piece of cotton sheet between the cushions for 24 -36 hours once coloured and dry to stop the two sections sticking together then apply Conditioning Cream. (Sold Separately)
Tip 6 You may use a hairdryer to help dye quicker.
Tip 7 The Flexible filler is AIR DRY so keep the lid on tight when not using. Best to use sooner than later. It will dry up in smaller quantities quicker.
There are some live steams from the Brisbane Home Show on our Facebook Page showing you just how easy this transformation is. Facebook
Warning: Always test on a small hidden area before use
You may also like…
-
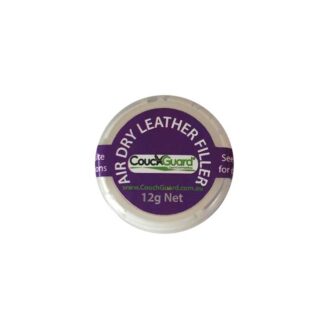
Leather Filler
From: $10.90 -
Leather Care Kit
From: $43.99 -
Leather Colour Reducer
From: $12.95 -
Aniline Leather Care Kit
From: $44.95 -
Leather Protection Kit
$43.99


Jeff P (verified owner) –
Excellent product, have used it on my vehicle to repair seats. Also on my couches to refresh and repair. Great advice and assistance provided for use and matching colours. Have previously used professionals but found them inadequate compared to CoucgGuard products.
Barry King (verified owner) –
The service and availability of the Items I requested was just short of outstanding, I couldn’t have been happier thank you Couch Guard.