
Leather Repair Kit
From: $38.00
CouchGuard® leather repair kit for your leather restoration. It contains everything you need to repair your leather couch including the Leather filler for scuffs, scratches, minor holes, grazes plus more. Leather glue for rips, tears and holes. Its flexible & durable & won’t rub off onto your clothes.
CouchGuard® Leather Paint is waterborne technology making it non-toxic, flexible and has the top coat sealer built right in. Just apply the colour in layers till covered and its done! With excellent rub fast properties and adhesion, it won’t come off onto your clothes.
Easy to follow directions are printed on the inside of our Complete Leather Repair Kits 50mL, 125mL and 500mL for different repairs. You’ll also find directions on this page below.
Over 60 colours “off The Shelf” to choose from.
- Description
- Additional information
- Reviews (13)
- FAQ's
- Direction's
- Video's
- In The Box
Description
The CouchGuard® Leather Repair Kit is ideal for leather couches and other leather surfaces like car seats, handbags, motor bike seats even shoes. Repairs such as scuffs, scratches, minor tears, burns and grazes and made easy when you use one of our Complete Leather Repair Kits.
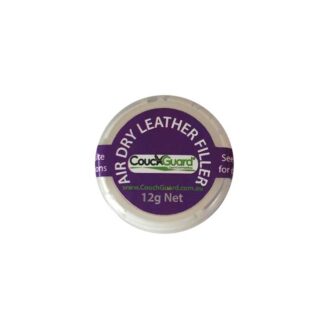
Our air dry leather filler is flexible and sand able when dry and can be applied easily using the tools provided in our leather repair kit.
The same Leather Repair Products have been used in tanneries for over 70 years. We have just simplified the products for the everyday person to use saving them hundreds on repairs and thousands on recolouring.
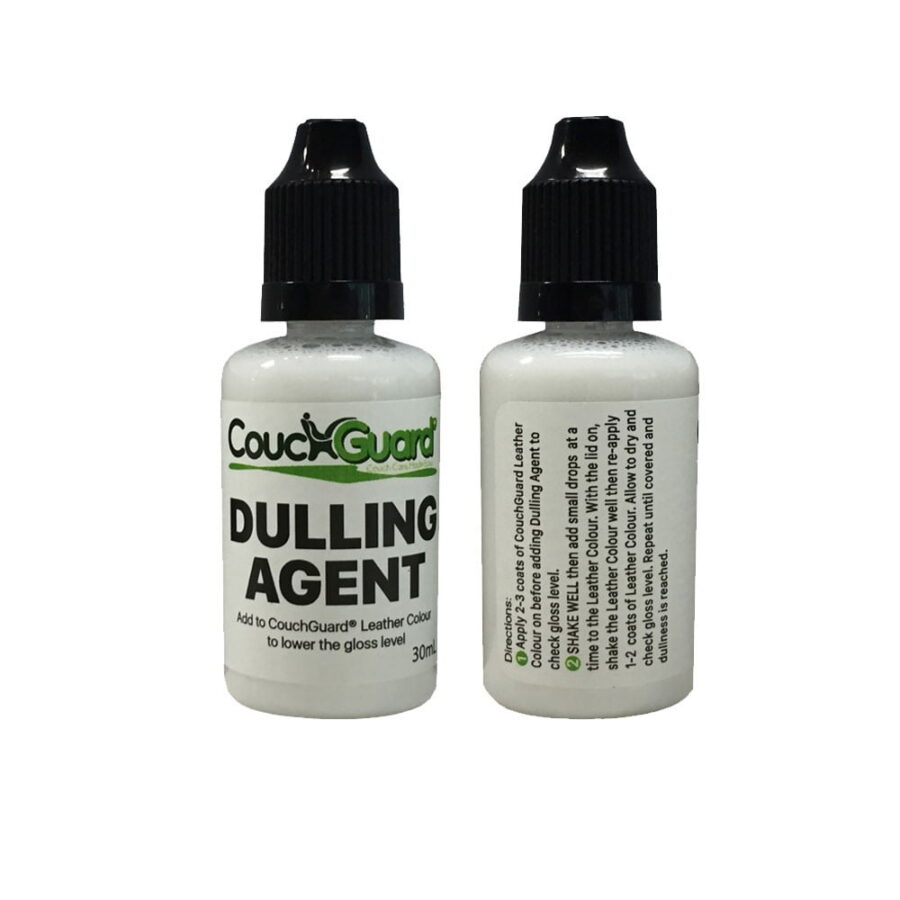
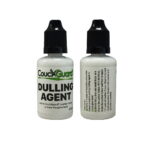
Our Leather Colours come Satin-Gloss finish, but we also do a Dulling Agent to lower the gloss level if needed.
We have found that the only difference between 4 of Plushes Blacks (PL – Black) is the gloss level.
Up to five 5ml Leather Colour Changers included in the 50ml, 125ml & 500ml kits for you to match your colour – FREE!
These are the pigment colours that make up the colour. We add them to the kits & the pigments vary depending on the colour selected.
Additional information
| Weight | 0.5000 kg |
|---|---|
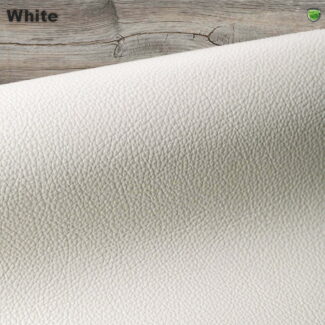
| Leather Colour | White, Off White, Cream, Bisque, Oyster, Bone, Beige, Oatmeal, Butternut, Stone, Orange, Yellow, Bright Red, Burgundy, New Beige, Coffee, Mushroom, Dark Taupe, Chocolate, Saddle, Cognac, Brown, Dark Brown, Brown Burgundy, Blue, Navy Blue, Royal Promis, Dark Blue, Lime, Classic Green, Cement, Charcoal, Black, PL – Astoria Cream, PL – Valencia Buff, PL – Pebble, PL – Eden Wine, PL – Calgary Chocolate, PL – Smooth Silver, PL – Coastal Cement, PL – Smooth Cement, PL – Black, LB – Lilly, LB – Ivory, LB – Madras Red, LB – Chestnut, LB – Claret, LB – Merlot, LB – Mocha, LB – Walnut, LB – Frappe, LB – Mushroom, LB – Pebble, LB – Midnight, LB – Pacific, LB – Fern, LB – Forest, LB – Cloud, LB – Cotton, LB – Storm, LB – Ebony, LB – Black |
| Kit Size |
13 reviews for Leather Repair Kit
Only logged in customers who have purchased this product may leave a review.
I would like to know how much coverage each different size kits covers?
A. Simply click or tap on the "In The Box" tab on the products page. Thats the Leather Repair Kits page.
There are dark patches on my couch where the head would rest?
A. This is common with this type of leather. It is meant to develop the worn look over time. So what ever you spill or mark it with will add character to the leather surface. This includes body and hair oils. The idea of the care kit is to clean the leather surface before replenishing the oils and waxes back into the leather hide to prevent it from drying out.Can I use your Leather Filler before applying the dye to fill some cracks?
No. You can't use leather filler or our Leather Repair Resin and leather dye together. The Leather Dye is alcohol based so it will soften the filler or resin. If you have an aniline leather, then no filler just dye. If you have a finished / pigmented leather then you can use the resin or filler and leather colour, which is leather paint.
I have an Aniline Leather couch with cracking on the arms. Can I use the Leather Filler and Premium Leather Dye to repair?
You can’t repair Aniline Leather like you can a Finished / Pigmented Leather. Once you sand and apply Leather Filler to an Aniline Leather it then becomes a Finished / Pigmented leather and needs Leather Paint to cover the filler. Your not going to replicate that finish with Leather Paint.
You can rub Leather Dye into your Aniline Leather (once prepped with Leather Prep) but you can't fill and sand the cracking. Dye takes on the colour is being applied to. So where there is colour now or a darker spot this will keep getting dark so the finish will be uneven. Thats how Aniline is.
Can I use your leather dye on other surfaces like suede, canvas or timber?
We say our Leather Dye is for leather but its up to you what you want to use it on.
Can I use the leather cleaning kit on blue leather?
Yes. You can use the Comprehensive Leather Care kit on all coloured leathers and not just white. This kit is designed for pigmented and finished leathers.
I have badly worn / cracked seating cushion. Can I use your products to repair and recolour this damage?
Yes and No. Not all leather is repairable as such. Generally the seating areas along with the arm and headrest areas are damaged from body oils, perspiration etc. The leather has absorbed these contaminates over the years so getting a permeant repair is near impossible. Adhesion may / will be an issue or those areas will crack again with little use.
You may also want to look at using our Leather Repair Resin if you don't want to do leather panel replacements.
If you do go ahead and repair badly damaged areas and the repairs fail, please don't blame our products when this happens.
I want to recolour my 5 seater modular. Would 500ml leather colour be enough?
No. You would need 3 litres or the 3lt kit for a 5 seater modular, no chaise. You'll also find an "Coverage Guide Ideal For..." under each kit listed in the "In The Box" tab. If you are ordering a 3lt kit and your modular has a chaise or is extra large you will need to purchase the additional 1lt Leather Colour
How To Repair Leather:
Simply read these easy to follow directions and your lounge will be like new again in no time at all!
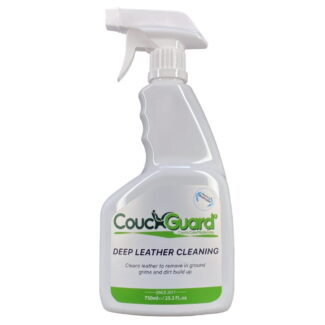
REMEMBER: Dirty leather needs to be completely cleaned with CouchGuard® Deep Leather Cleaner before using the Leather Prep.
For Minor Scratches
1 Place a drop sheet or old towel around the couch to be repaired to protect floor coverings. (not supplied in the 50, 125 or 500ml kits)
2 Make sure leather is free from contaminants like body oils etc by using our Deep Leather Cleaner. (Sold Separately)
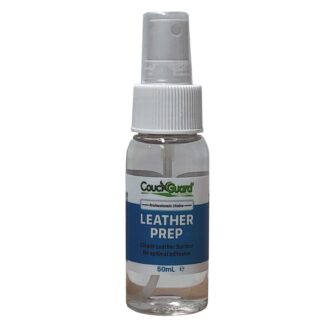
3 Spray the CouchGuard® Leather Prep onto the leather to be repaired and wipe dry.
The leather prep is not a leather cleaner and the leather must be recoloured after using.
4 Lightly sand the repair area with 400 grit sand paper and 600g on the leather around around the repair.
5 Wipe away loose particles thoroughly.
6 Using the spatula provided, slowly build the flexible leather filler over the scratch.
Allow to air dry.
7 If required, lightly sand with 600 grit sand paper followed by 800 grit sand paper.
8 Wipe area over with the damp microfibre towel before applying CouchGuard® Leather Colour.
9 Clean up with water.
Poor preparation will lead to a poor finish even peeling. Take you time and be patient.
Tip: You may use a hairdryer to help dye quicker
Note: The Flexible filler is AIR DRY so keep the lid on tight when not using. Use sooner than later. It will harding.
For Cuts Deep Scratches or Holes
1 Place a drop sheet or old towel around the couch to be repaired to protect floor coverings.
(not supplied in the 50,125 or 500ml kits)
2 Make sure leather is free from contaminants like body oils etc by using our Deep Leather Cleaner. (Sold Separately)
3 Spray the CouchGuard® Leather Prep onto the leather to be repaired and wipe dry. The leather prep is not a leather cleaner and the leather must be recoloured after using.
4 Lightly sand the repair area with 400 grit sand paper and 600g on the leather around around the repair.
5 Wipe away loose particles thoroughly.
6 Cut the backing fabric larger then the cut or hole and place on the underside of the leather using the tweezers. Once in position, apply a small beed of CouchGuard® Leather Glue to one side of the cut and press down firmly. Now repeat on the other side. You can use a hairdryer to heat the area, activating the glue and press down firmly. Clean up any excess glue with water.
7 Using the spatula provided, slowly build the flexible leather filler over the scratch in coats. Allow each coat to air dry. See Note: below.
8 If required, lightly sand with 600 grit sand paper followed by 800 grit paper.
9 Wipe area over with the damp microfibre towel before applying CouchGuard Leather Colour.
10 Clean up with water between coats (Spatula).
Try using a small piece of leather and cut to the size of the hole then glue into place. There is a small piece on the lid of the Complete Leather Repair Kits.
Repairing Cracked Leather
Being worn, open leather, it will absorb the leather prep more so than "normal leather" so make sure the area is completely dry before applying the resin.
1 Wash the area well with Leather Prep using a microfibre towel. Dry well
2 Lightly sand 400g sandpaper to remove any flaking or loose topcoat.
3 Using a sponge, apply the Leather Repair Resin in an even, thin layer to start with and allow to dry. Repeat until the area is repaired to your liking. You may also pour the resin on for larger areas and allow it to flow out remembering though, the thicker you apply it the longer it will take to dry.
4 You may use a hairdryer to help dye quicker.
5 Lightly sand with 400g to 600g paper and apply CouchGuard® Leather Colour to finish off the repair. You may also apply a thin layer of leather filler if needed at this point.
Warning: Always test on a small hidden area before use
Recolouring Leather
1. Place a drop sheet or old towel around the couch to be repaired to protect floor coverings. (supplied in the 1, 2 and 3lt kits)
2. Make sure leather is free from contaminants like body oils etc by using our Deep Leather Cleaner. (Sold Separately)
3. Lightly sand the leather all over with 600g sand paper to etch the surface.
4. Spray the CouchGuard® Leather Prep onto the leather to be recoloured and wipe dry. The leather prep is not a leather cleaner and the leather must be recoloured after using.
5. Shake the CouchGuard® Leather Colour well and poor an amount into the roller tray. Cover the foam roller with the leather colour, rolling out and excess colour and start to apply it to the leather surface.
6. Apply the colour in layers and don't apply too much at once. Work your way around the leather covering all the large areas 1st.
7. Once the main large areas are recoloured, generally 4-5 coats you then need to start on the fiddly hidden bits. This is best done the next day using the foam sponge and or foam brush supplied. Use the spreaders (wall dowels) between the leather to hold it apart.
8. Hold the leather up and apply one coat of colour. Dry using a hairdryer and repeat until covered. Once dried with the hairdryer, place a piece of white cotton cloth between the 2 surfaces for a good 24 hours. This will stop the surface sticking together.
9. Sometimes you may find small amounts of dust or specs of dirt in the finish. Simply lightly sand the surface with 800g sand paper, reduce the leather colour with CouchGuard® Leather Reducer (10%) and apply 2 more coats. You are now done!
10. Clean up with water.
Tip: The Flexible filler is AIR DRY so keep the lid on tight when not using.
You may also spray our leather colour on too if you have a compressor and spray gun. The colour will need to be reduced with CouchGuard® Leather Colour Reducer by no more than 10%.
Warning: Always test on a small hidden area before use
Tips
Tip 1 Rinse the sponge well in under running water and ring out the excess water before using.
Tip 2 Do the tape test after 1 or 2 coats to check adhesion. Once dry, apply masking tape and rub down firmly then rip off. If no colour is stuck to the tape, continue recolouring. If there is colour stuck to the tape, prep again.
Tip 3 After 4 coats of colour, let completely dry the lightly sand with 800g sandpaper. This will remove and debris. Reduce the colour down a little then apply two more coats.
Tip 4 Use the plastic dowel plugs to hold the leather apart while colouring. i.e: between seating cushions, between the seat cushion and the arm cushion etc. Once the leather is coloured and dry, move the dowel along and touch up the area.
Tip 5 Place a piece of cotton sheet between the cushions for 24 -36 hours once coloured and dry to stop the two sections sticking together then apply Conditioning Cream. (Sold Separately)
Tip 6 You may use a hairdryer to help dye quicker.
Tip 7 The Flexible filler is AIR DRY so keep the lid on tight when not using. Best to use sooner than later. It will dry up in smaller quantities quicker.
There are some live steams from the Brisbane Home Show on our Facebook Page showing you just how easy this transformation is. Facebook
Warning: Always test on a small hidden area before use
More Videos by tapping or clicking on these links:
Whats In The Box Of The CouchGuard® Leather Repair Kits
- 1 x 12g Leather Filler
- 1 x Plastic Spatula
- 1 x Backing Fabric 100mm x 100mm
- 1 x 5ml Leather Glue
- 1 x Blade
- 1 x 400 Sand Paper
- 1 x 600 Sand Paper
- 1 x 800 Sand Paper
- 1 x Tweezers
- 1 x 50ml or 125ml Leather Colour
- up to 5 Assorted Leather Colour Changes
- 1 x 50ml Leather Prep
- 1 x Foam Brush
- 1 x Foam Sponge
- 6 x Cotton Dabbers
- 2 x Disposable Gloves
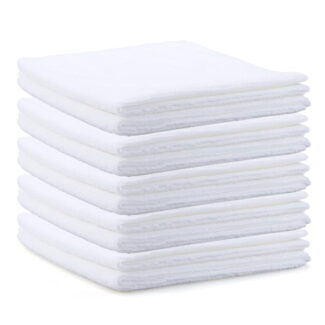
- 4 x Button Towel
Coverage - Ideal for repairing scuffs, scratches, minor holes in couches & vehicle trim.
- 1 x 40g Leather Filler
- 1 x Plastic Spatula
- 1 x Backing Fabric 100mm x 100mm
- 1 x 5ml Leather Glue
- 1 x Blade
- 2 x 400 Sand Paper
- 2 x 600 Sand Paper
- 2 x 800 Sand Paper
- 1 x Tweezers
- 1 x 500ml Leather Colour
- up to 5 Assorted Leather Colour Changes
- 1 x 50ml Leather Prep
- 1 x Foam Brush
- 1 x Foam Sponge
- 6 x Cotton Dabbers
- 2 x Disposable Gloves
- 4 x Button Towels
Coverage - Ideal for repairing larger scuffs, scratches, minor holes in couches, dining room chairs & vehicle trim.
Larger Kits For Re-Colouring and Repairing
- 1 x 40g Leather Filler
- 1 x Plastic Spatula
- 1 x Backing Fabric 100mm x 100mm
- 1 x 5ml Leather Glue
- 2 x 400 Sand Paper
- 2 x 600 Sand Paper
- 2 x 800 Sand Paper
- 4 x Disposable Gloves
- 2 x Microfibre Towels
- 1 x 1lt Leather Colour
- 1 x 250ml Leather Prep
- 2 x Foam Brush
- 2 x Foam Sponge
- 1 x 100mm Foam Roller & tray
- 2 x Spare 100mm Foam Rollers
- 12 x Assorted Plastic Spreaders
- 1 x Drop Sheet
Coverage - Ideal for 1 recliner, large dining room chairs, bucket seats or equivalent.
- 1 x 40g Leather Filler
- 1 x Plastic Spatula
- 1 x Backing Fabric 100mm x 100mm
- 1 x 5ml Leather Glue
- 3 x 400 Sand Paper
- 3 x 600 Sand Paper
- 3 x 800 Sand Paper
- 4 x Disposable Gloves
- 2 x Microfibre Towels
- 1 x 2lt Leather Colour
- 2 x 250ml Leather Prep
- 2 x Foam Brush
- 2 x Foam Sponge
- 1 x 100mm Foam Roller & tray
- 2 x Spare 100mm Foam Rollers
- 12 x Assorted Plastic Spreaders
- 1 x Drop Sheet
Coverage - Ideal for recolouring 2 recliners, 3 seater or vehicle trim.
- 1 x 40g Leather Filler
- 1 x Plastic Spatula
- 1 x Backing Fabric 100mm x 100mm
- 1 x 5ml Leather Glue
- 4 x 400 Sand Paper
- 4 x 600 Sand Paper
- 4 x 800 Sand Paper
- 4 x Disposable Gloves
- 4 x Microfibre Towels
- 3 x 1lt Leather Colour
- 1 x 1lt Leather Prep
- 3 x Foam Brush
- 3 x Foam Sponge
- 1 x 100mm Foam Roller & tray
- 2 x Spare 100mm Foam Rollers
- 12 x Assorted Plastic Spreaders
- 1 x Drop Sheet
Coverage - Ideal for larger recolouring like a 2 plus 3 seater.
The 4lt and 5lt kits contain the same items as the 3lt kit.
"Coverage - Ideal...for is a guide only and may vary depending on the colour being used, how its applied or what colour its being applied over"
You may also like…
-
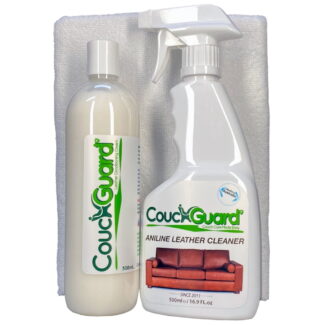
Leather Care Kit
From: $43.99 -
Leather Prep Wash
From: $11.90 -
Leather Conditioner
From: $12.95 -
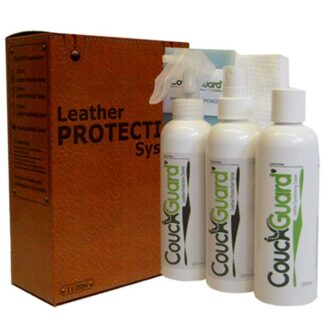
Leather Protection Kit
$43.99 -
Leather Filler
From: $10.90


Fiona (verified owner) –
The products are great quality and easy to use. I’m very happy with the results – my hole in my sofa is gone and you can’t see it at.
Tony L (verified owner) –
We we delighted with how simple it was to colour our leather lounge suite. The CouchGaurd web site was easy to follow to know what we needed and the instructions were simple to follow. Several years on we are still happy with our decision to use these products.
Teresa B (verified owner) –
5 Stars
Trish Emley (verified owner) –
I’ve used CouchGuard leather colour to rejuvenate a near 30 year old chair and lounge and restore a vintage Moran lounge. The process is very easy and the results have been fantastic. I’ve even used the colours to give my shoes a fresh face! Very pleased with all the results.
Deb Mulcahy (verified owner) –
Hey Tim, Just wanted to tell you how pleased I am about my repair kit and you matched the colour perfectly. The kit has really worked some magic on the scratches on the chair.
Thanks again for all your help, it’s very much appreciated.
Phil Parsons (verified owner) –
Thanks Tim for a fabulous product and package. I hadn’t used anything like this before and have great results on the first attempt. Will be buying more product in future.
Charles Spiteri (verified owner) –
Thank for supplying such a great product. We used the supplied shade toners with the selected colour as well as looked up a YouTube instruction (little at a time and let it dry completely) and received a lovely result.
The product worked beautifully and saved us heaps of money!
Ian Fergusson (verified owner) –
Love it great product and had a Great result on our couch
Ray Davies (verified owner) –
The leather repair kit is just incredible. Easy to use and the sofa looks like new. Very happy!!!
Fiona Calnan (verified owner) –
I bought CouchGuard to remove some bad wear and tear on two leather sofas and some cat damage too. It was very easy to use and did a fantastic job. Both my husband and I I very satisfied with the final finish and would definitely recommend this product
John Manczak (verified owner) –
CouchGuard I am very pleased with my repair results and will recommend you products to everyone who need leather products.
Deb Henderson –
Thanks so much for your assistance with the repair kit. It arrived and I have used it to colour the patch in my sofa.
I want to say that it is a wonderful product with instructions that were clear and easy to follow.
What a great product it is. Congratulations, Couchguard, for your product and the innovative way you package it with the instructions on the box. Marvellous!! I’ll be spreading the word about your products.
Regards
Deb Henderson
Damian Ferrie –
Hey guys, just used your leather colour kit to give my 10 year old leather couches a make over. Very very impressed, I was apprehensive about using and matching the colour but the dark brown matched perfectly. Thanks a million.